Step-by-Step Guide to Creating and Connecting EC2 and EBS with AWS CLI


Table of contents
In this article, I will explain AWS CLI by creating key pair, security group, ec2, ebs and connecting altogether. Before moving to that first understand what is AWS CLI.
What is AWS CLI?
AWS CLI stands for Amazon Web Services Command Line Interface. It is a unified tool for managing AWS services from the command line. With AWS CLI, you can control various AWS services through commands in your terminal or command prompt.
Benefits of using AWS CLI
The AWS CLI provides a convenient way to automate tasks and interact with AWS services, allowing users to easily create, manage, and monitor resources in the cloud. It supports a wide range of services such as EC2, S3, Lambda, CloudFront, and more.
The AWS CLI is available for Windows, macOS, and Linux operating systems, and it can be installed using either pip or a pre-built package. AWS CLI provides a robust set of features that allow developers and system administrators to easily manage their AWS resources from the command line, making it an essential tool for anyone working with AWS.
Practical:
Now you got the idea of AWS CLI let's dive into practical how to use AWS CLI.
1) Install AWS CLI:
Download and install AWS CLI. Use the link given below to download it.
https://awscli.amazonaws.com/AWSCLIV2.msi
Install it by double-clicking on the downloaded software and complete the installation by clicking next
Alternatively, you can use the following command as well
msiexec.exe /i https://awscli.amazonaws.com/AWSCLIV2.msi
Check if it's installed or not using
aws --version

2) Create an IAM user for access key and secret:
To connect with the AWS account using aws cli from your system aws access and a secret key are required, for that we've to create an IAM user first.
After creating an IAM user, create access and secret key. Keep that key with you.
3) log in to AWS account using AWS CLI
To log in from AWS CLI run the following command:
aws configure
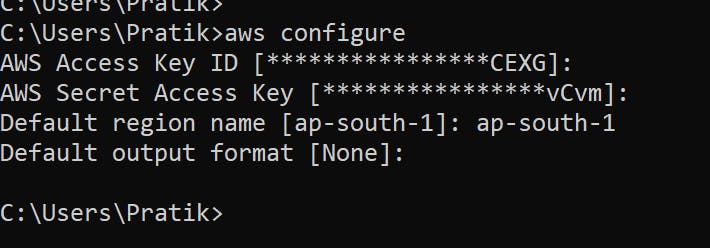
Enter AWS access id and secret key in respective feilds.
Now you are all set up to start using aw services from CLI.
4) Create key pair
To create a Key Pair, run the following command:
aws ec2 create-key-pair --key-name my-key-pair --query 'KeyMaterial' --output text > my-key-pair.pem

It will be stored in same location in "my-key-pair.pem" file

5) Create a Security Group
To create a Security Group, run the following command:
aws ec2 create-security-group --group-name my-security-group --description "My security group"

This command creates a new Security Group named "my-security-group" with a description of "My security group".
6) Configure Security Group Rules
Next, configure the Security Group rules to allow incoming traffic to the instance. In this example, we will allow incoming SSH traffic on port 22 and HTTP traffic on port 80.
aws ec2 authorize-security-group-ingress --group-name my-security-group --protocol tcp --port 22 --cidr 0.0.0.0/0

aws ec2 authorize-security-group-ingress --group-name my-security-group --protocol tcp --port 80 --cidr 0.0.0.0/0
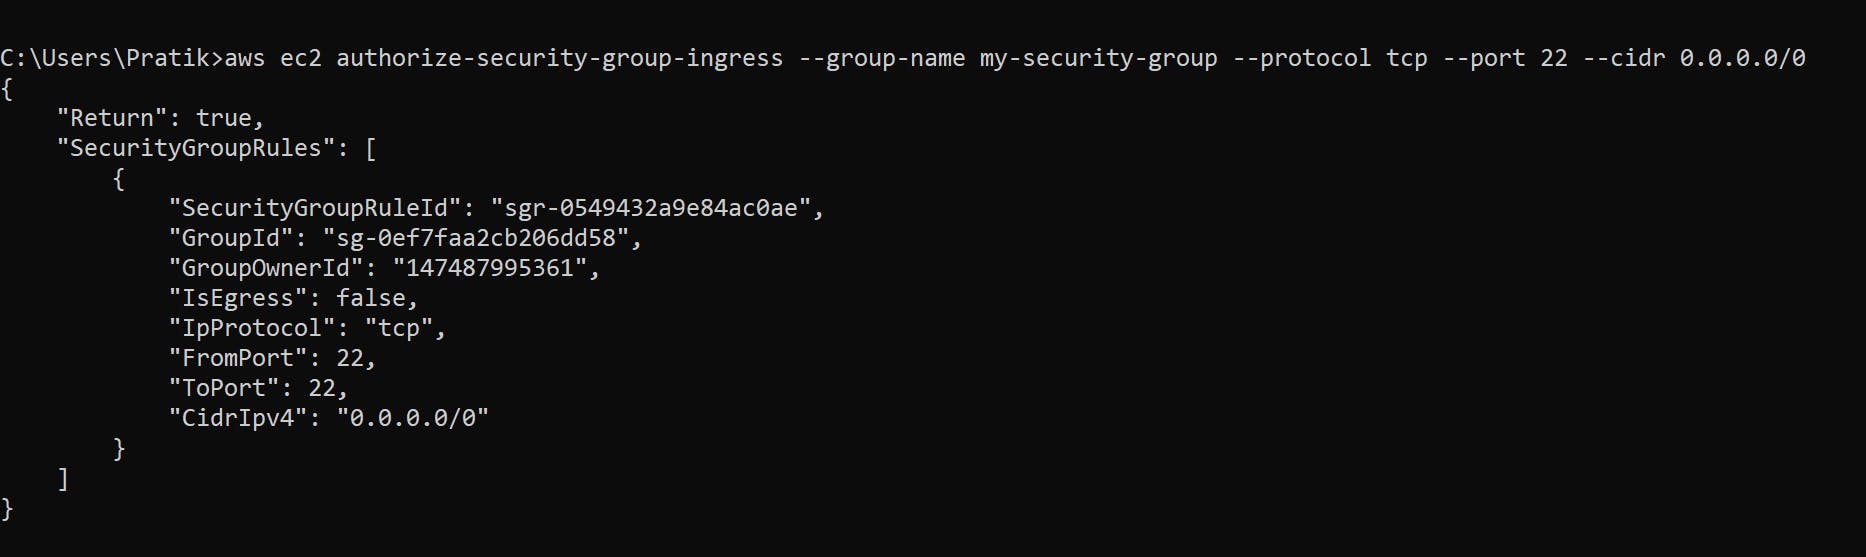
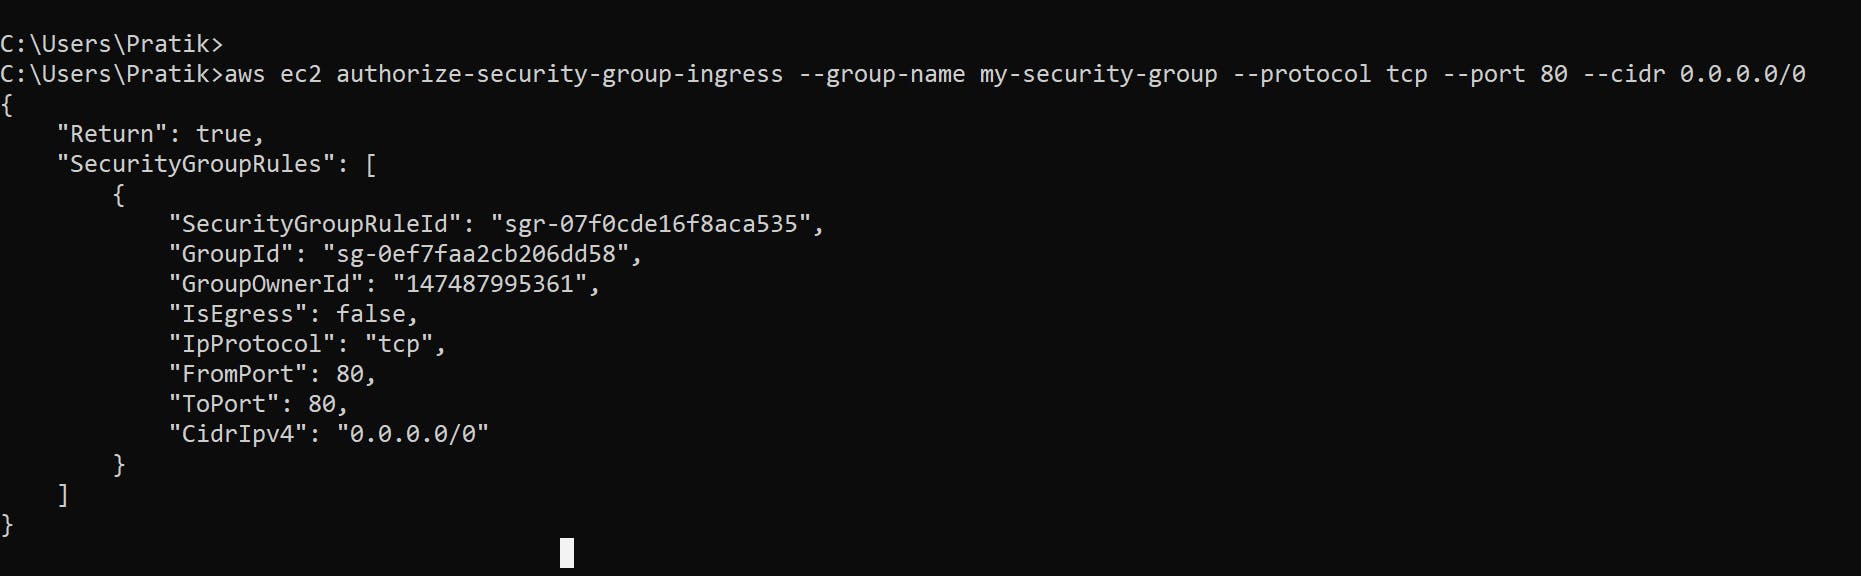
The first command allows incoming SSH traffic from any IP address. The second command allows incoming HTTP traffic from any IP address.
7) Launch an Instance
To launch an instance, use the following command:
aws ec2 run-instances
--image-id ami-0d81306eddc614a45
--count 1
--instance-type t2.micro
--key-name my-key-pair
--security-groups my-security-group
--tag-specifications ResourceType=instance,Tags=[{Key=Name,Value=test}]
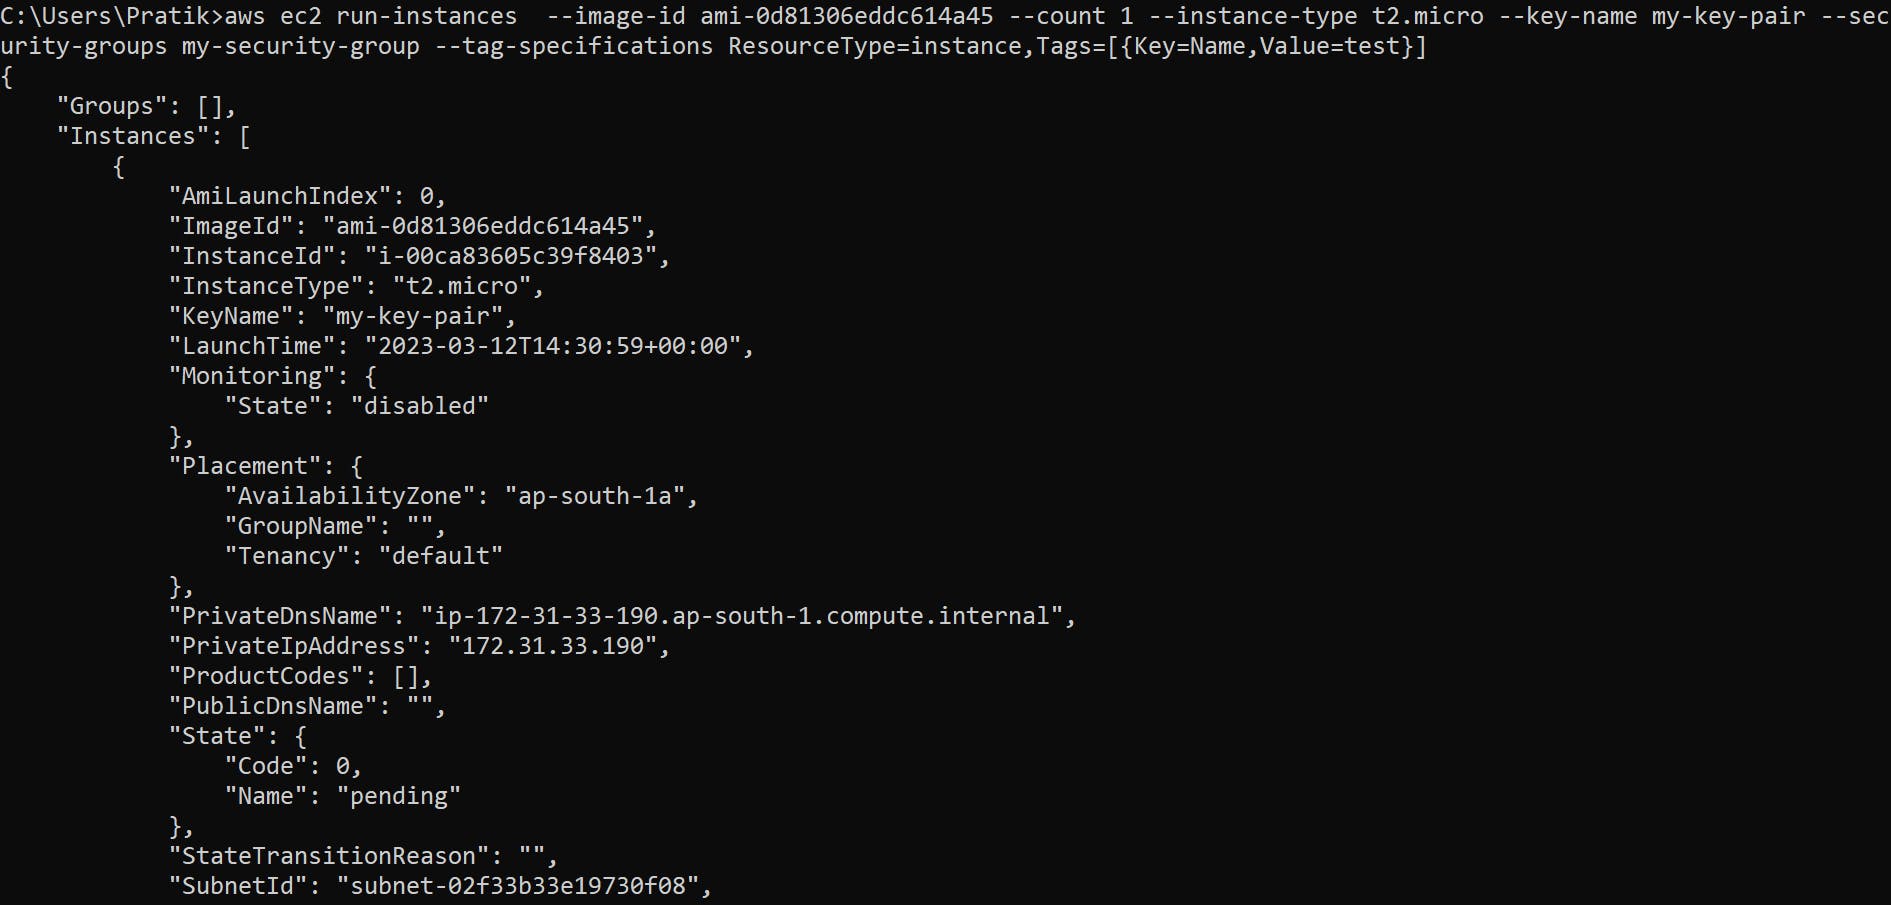
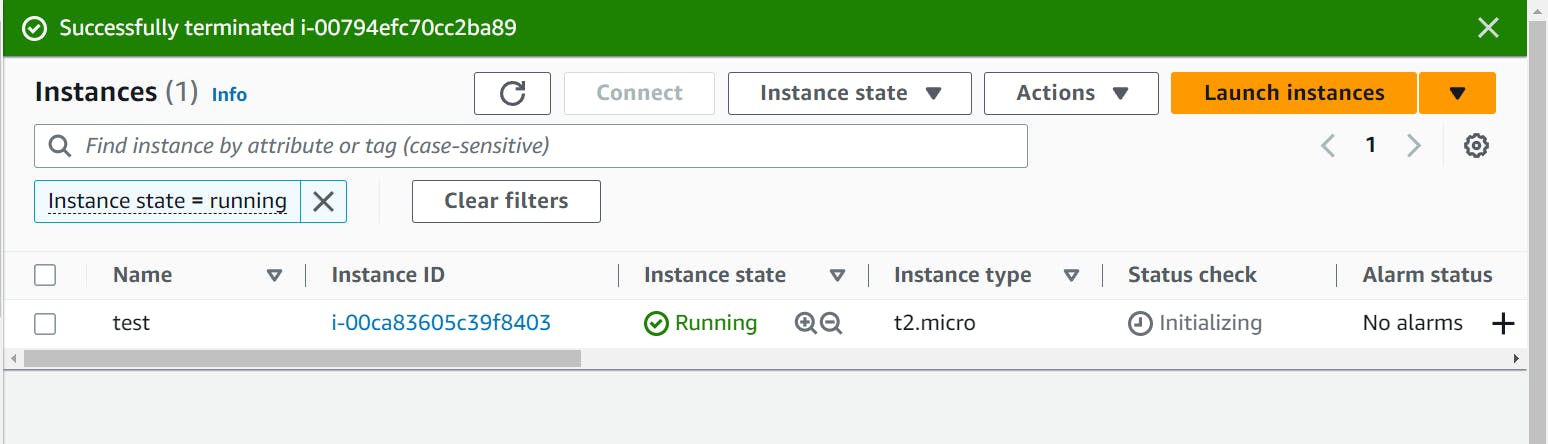
This command launches an Amazon Linux 2 instance with the t2.micro instance type, using the Key Pair and Security Group you just created.
8) Create an EBS Volume
To create an EBS volume, run the following command:
aws ec2 create-volume --availability-zone ap-south-1a --size 2 --volume-type gp2
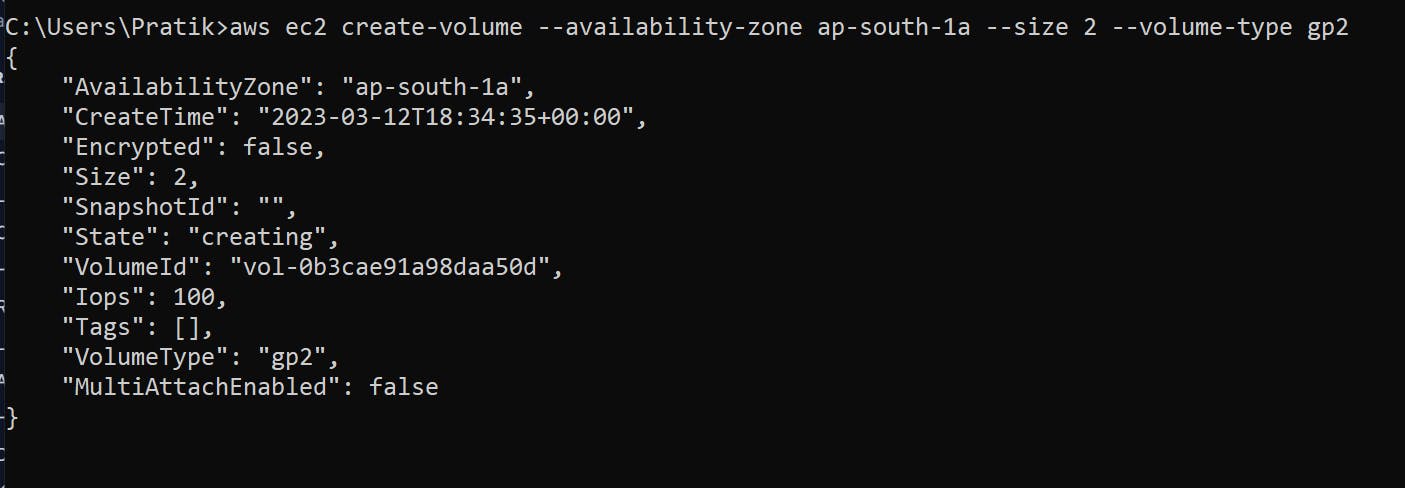

This command creates a new 2GB EBS volume in the us-east-1a availability zone, using the gp2 volume type.
9) Attach the EBS Volume to the Instance
To attach the EBS volume to the instance, use the following command:
aws ec2 attach-volume --volume-id <volume-id> --instance-id <instance_id> --device /dev/sdf
Change <volume-id> and <instance-id> with actual id's we just created

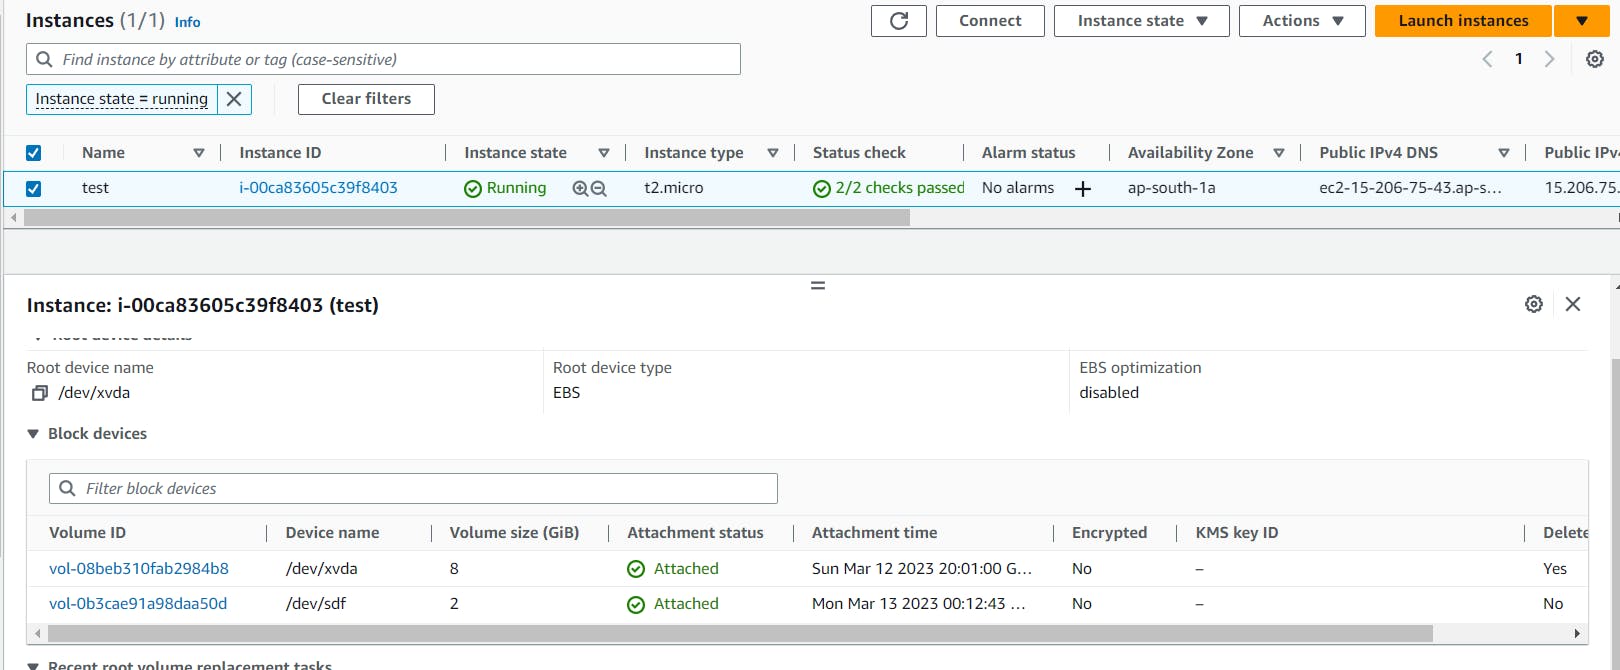
You can see more 2 gb storage is attached to test instance.
Done !!! You have sucessfully created ec2 , ebs , key pair , security group using aws cli and learned to attach ec2 and ebs together .
Now go inside instance and enjoy this setup as per your use .
If you to destroy this setup using aws cli only , here is additional commands which will help you.
Detach EBS volume from instance using cli
aws ec2 detach-volume --instance-id <instance_id> --volume-id <volume_id>

Stop running instance
aws ec2 stop-instances --instance-id <instance_id>
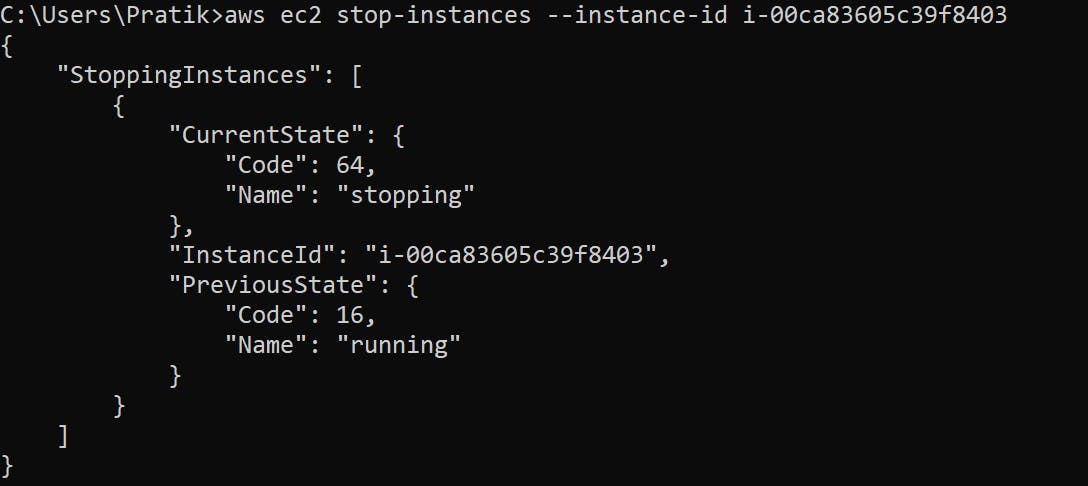
This will stop running instance .
That's all about this article . Now you got idea about how to use AWS CLI you can play around other services using AWS CLI.
Thanks for reading !
Happy Learning :)